

Creating isometric illustrations made easy. A step by step tutorial for Figma


Our design team at Angry Nerds works in Figma on a daily basis – and we absolutely love it! Building web and mobile apps have never been more enjoyable. Recently, we tried to design some isometric illustrations for one of our projects and we discovered how easy it is to make such visuals in Figma. Here’s a tutorial!
First things first – what is an isometric projection?
Put simply, it is a two-dimensional depiction of a three-dimensional object. What distinguishes isometric projection is that all the axes look equally foreshortened as the angle between any two axes equals 120°.
You're probably familiar with isometric projections from games such as Fallout 2, Planescape: Torment, Diablo or Sim City. Isometry is very useful when it comes to architecture, technical visualizations, engineering drawings, and instructions. Moreover, it’s been successfully used as an illustration technique in web design. Many companies from the IT industry use isometric projection also to create visual assets for their brand, as its technical character corresponds with their image and services.
Now let’s get down to business - follow this step by step guide and create your first isometric illustration in Figma!
In order to create the illustration, you’ll need:
1. Figma – you can download it for free here.
2. Isometric grid – you can download it in Figma, in the section Community>Files – or directly from this link.
3. Ease Isometric plugin – you can find it in Figma, in Community>Plugins, or directly here.
4. An idea for the illustration! I’ll show you how to create the Angry Nerds logo - you can choose any other shape, but remember to pick a simple one for a start 😊
Ready? Let's begin!
Step 1: Create your worksheet
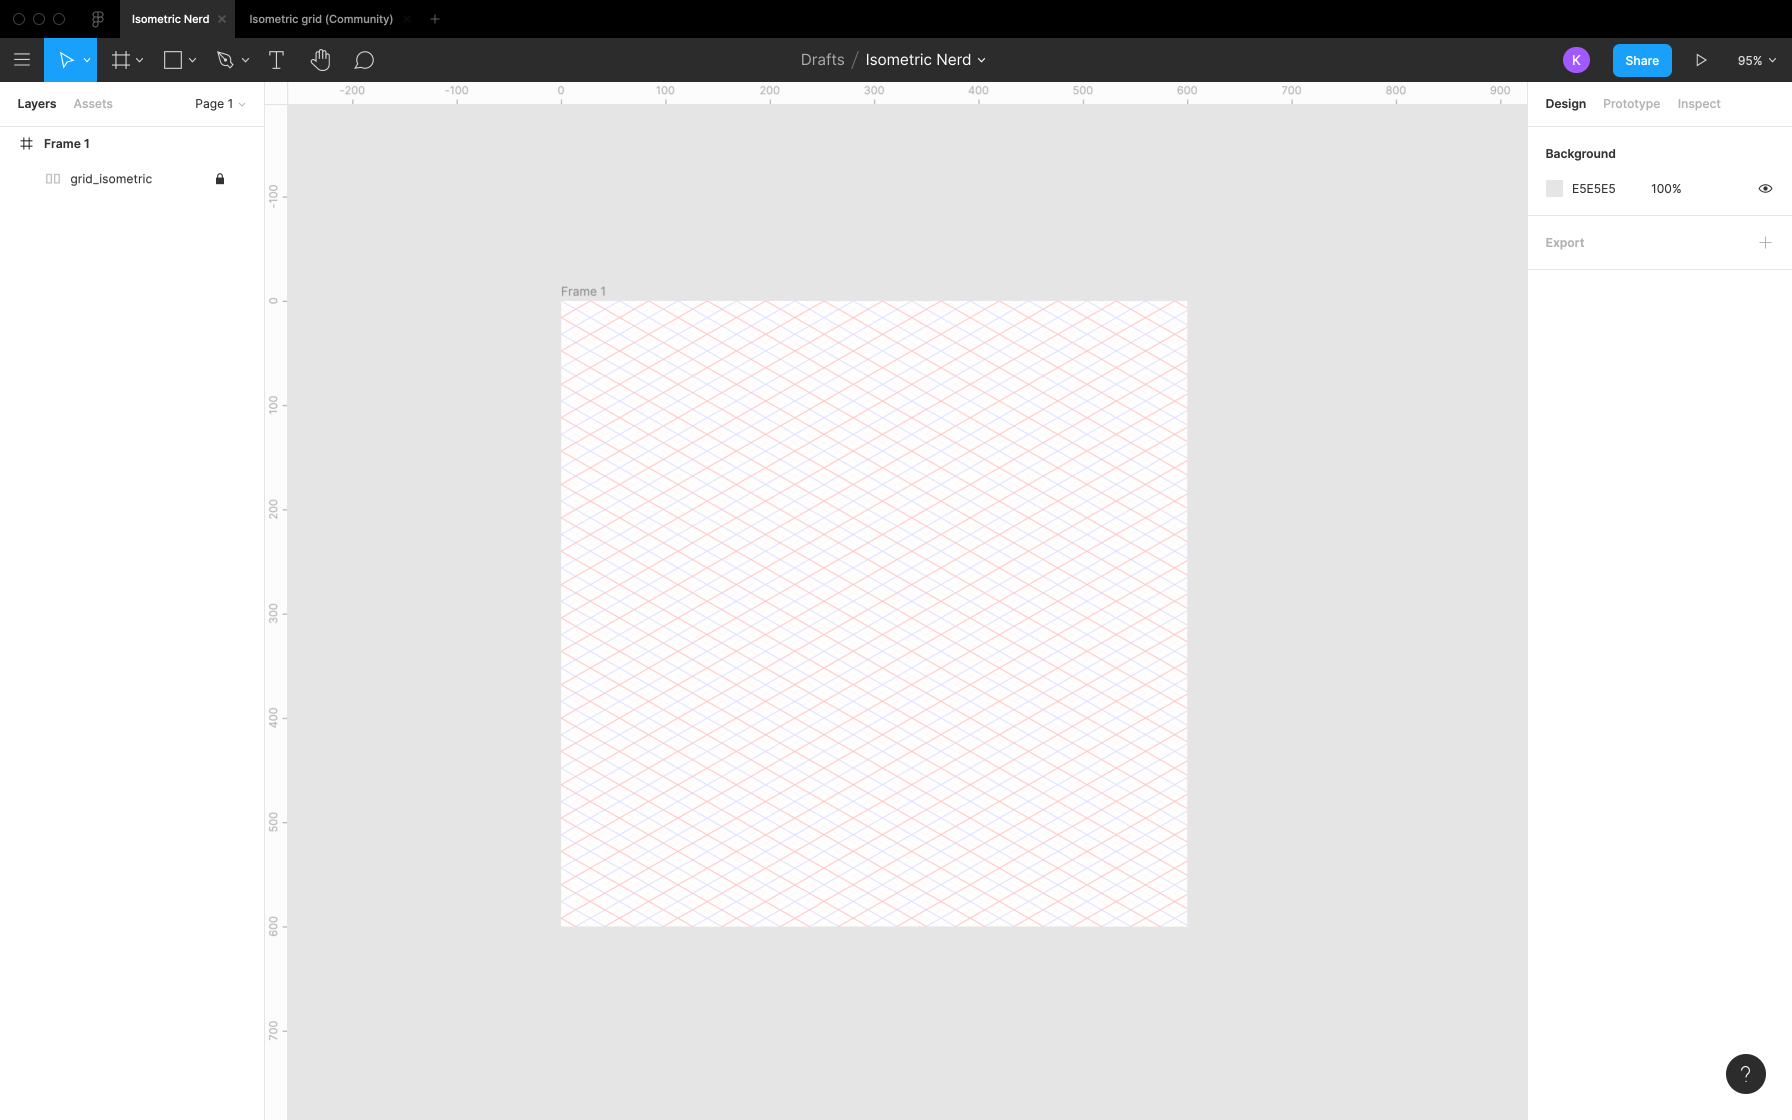
Start with creating a new file by clicking + next to Drafts. You can change the file’s name by clicking Untitled or choosing Rename from the dropdown menu.
Now, create a new Frame (F) that will measure 600 x 600 px. You can set the size in the panel on the right, below Frames.
Copy the grid from Isometric grid (Mac: ⌘+C / Win: Ctrl+C). Make sure you selected the whole frame, not a single element!
Paste the grid to your newly created file and drag it to your Frame. On the left panel, you should see Grid_isometric to be under Frame 1. You can set the grid manually on your worksheet or use Align – you will find this option in the panel on the right. I chose Align Left and then Align Top.
Next, in the Layer section in the right panel, set the grid visibility to 30%. Remember that the grid needs to be selected in the left panel anytime you perform actions on it!
The last thing is locking the layer with the grid. To do it, hover over the layer with the grid in the left panel. You should notice an open padlock icon. Click on the padlock and when it turns to a closed one, the layer has been locked.
As a result, you should see this:
Step 2: Let’s start drawing
Now it's time to use your drawing skills! Draw (or copy) the shape you’d like to draw in isometry.
The tools you’ll need when drawing are the following:
• Pen Tool (P) - create paths
• Move Tool (V) - move elements
• Double click on the element – edit points
• Esc – uncheck the point, stop drawing a path
• ⌘+G / Ctrl+G – group elements
• Shift+⌘+G / Shift+Ctrl+G – ungroup elements
I will draw the Angry Nerds logo.

Now it’s time to use the plugin. Open the hamburger menu on the left and choose Plugins>Ease Isometric. Before you start to transform your drawing, remember to group the elements. Create a few copies of your drawing and check which version (4 squares in the top row) suits you best.
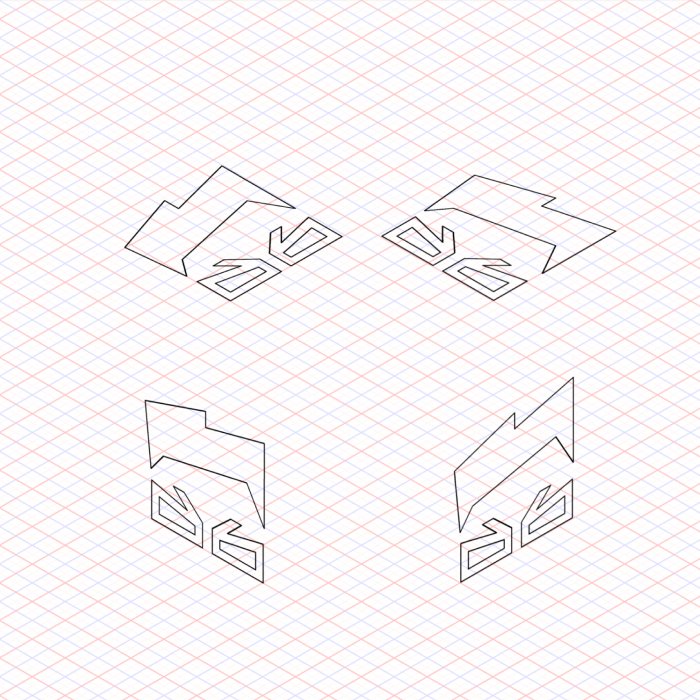
I selected the one in the bottom left corner – it’ll be my front wall. In order to create the back one, you need to copy the drawing and move it down the grid. The further you move it – the thicker the final shape will get.
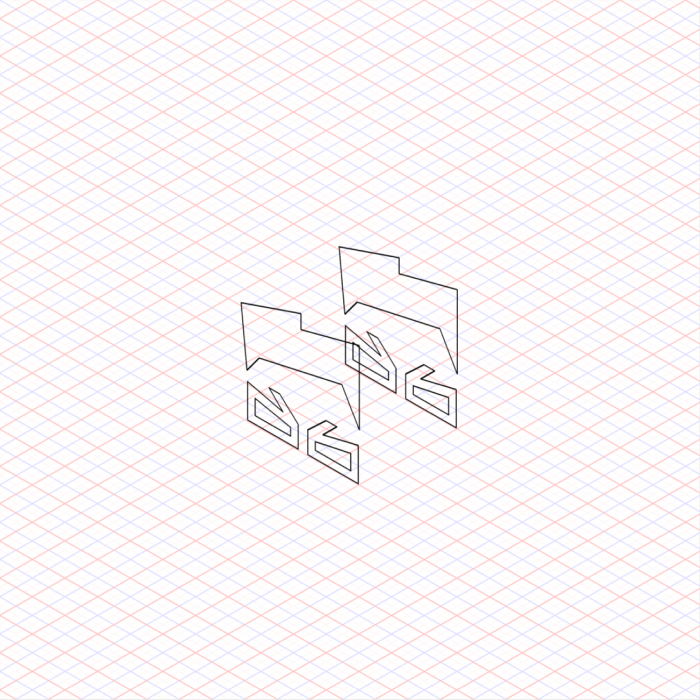
Before we start the next stage of drawing, we can do a few things to make it easier for us:
→ Enlarge the drawing – select both elements and while holding Shift, extend them to a chosen size.
→ Change the visibility of the back wall to 30%.
→ Lock the back wall.
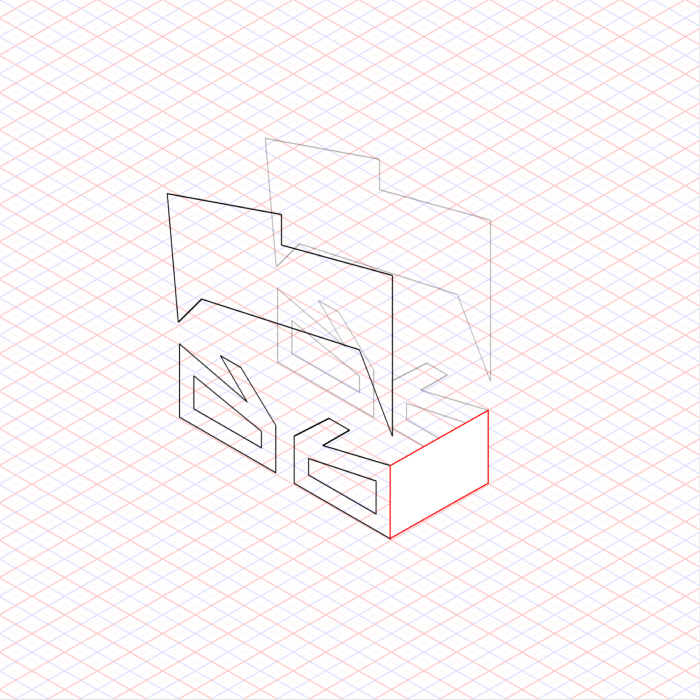
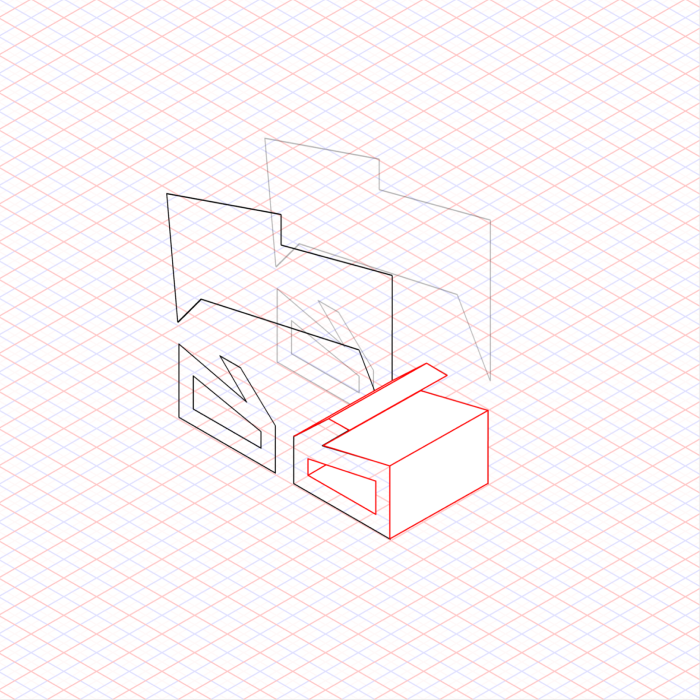
Step 3: Let’s draw a little more
Now it’s time to draw the side walls. It requires some focus and consideration about what should be visible, and what shouldn’t.
At this stage, you can make use of the knowledge on changing the color of the lines or filling the shape. Create a shape and select it. In the right panel, you will see two sections: Fill and Stroke. To fill the shape, click + in the Fill section. You can change the color of the filling by clicking on the gray square. I suggest choosing white. Below, in the Stroke section, I suggest changing the color of the lines to red, so you can see them clearly when drawing.
A few useful shortcuts:
• Copy Properties - Mac: ^+⌘+C / Win: Alt+Ctrl+C
• Paste Properties - Mac: ^+⌘+V / Win: Alt+Ctrl+V
• Move Layers Up - Mac: ^+⌘+↑ / Win: Alt+Ctrl+↑
• Move Layers Down - Mac: ^+⌘+↓ / Win: Alt+Ctrl+↓
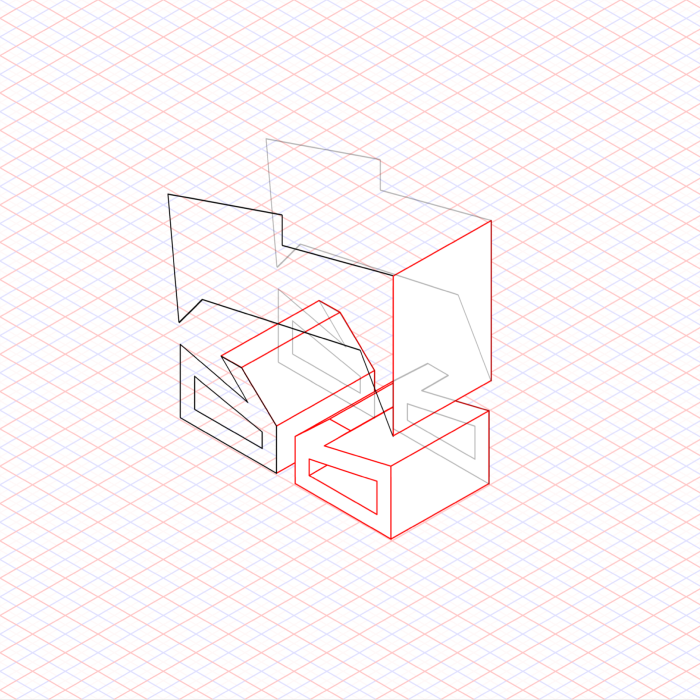
The Nerd is almost ready!
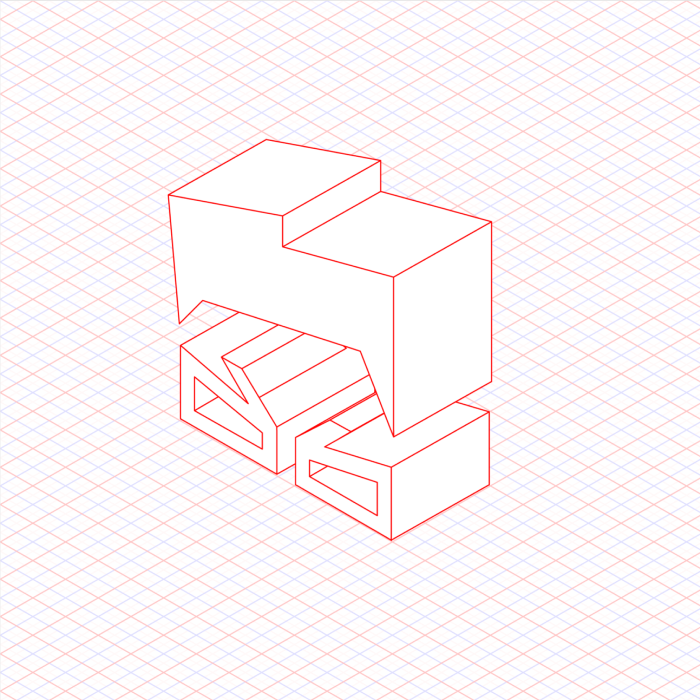
Step 4: Coloring, bells and whistles
It’s time for the finishing touches! Start from turning off the grid. Go to the left panel and click on the eye icon next to the grid layer. To change the background color, select Frame and change the color in the Fill section on the right. While changing the colors of the elements, remember to be consistent about the direction of light. Some elements need to be brighter, others – darker.
And here you are – an iso-nerdic illustration! (yeah, I know, terrible pun)

Feel free to experiment with more and more complex shapes – you'll see that with every drawing it gets easier. Let us know if you have any questions or want to share your creations!
Happy creating 😊
About the Author
Klaudyna Hałon is a skilled digital artist and UX/UI designer – and of course, she’s part of our amazing Design Team at Angry Nerds! She creates web and mobile apps, custom illustrations, icons, and all kinds of visual assets. She is also a Figma enthusiast and loves to share her knowledge, so there may be more tutorials from her coming to our blog! In her free time, Klaudyna trains dog sports with her pup, Lotka.
 Angry Nerds (Poland)
 Angry Nerds (USA)
 Angry Nerds (Canada)


